Introduction
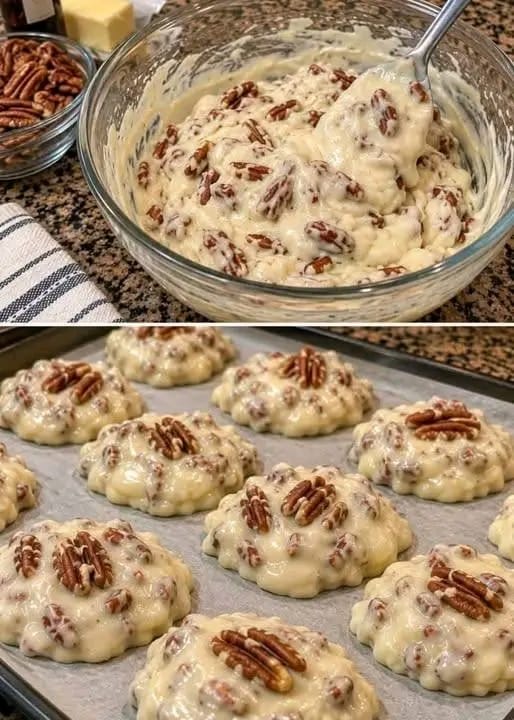
These are the Christmas cookies I make year after year, and every holiday season, they disappear almost as quickly as I put them on the table! They are buttery, sweet, wonderfully tender, and filled with the comforting flavors that make Christmas baking so special.
The best part? This recipe uses simple pantry ingredients, requires no complicated equipment, and is easy enough to prepare with the whole family. Whether you’re baking for a Christmas party, preparing cookie boxes for friends, or filling your kitchen with the delicious aroma of freshly baked treats, these cookies are always a wonderful choice.
I love making a big batch because they are perfect for sharing. Arrange them on a festive platter, wrap them in decorative bags, or leave a plate out for guests to enjoy with coffee, tea, or a glass of milk.
The secret to these cookies is the combination of butter, sugar, vanilla, and a gentle baking method that creates a lightly crisp exterior with a tender center. Add colorful holiday sprinkles, and you have a beautiful homemade treat that looks just as good as it tastes.
If you’re looking for a reliable Christmas cookie recipe to add to your holiday tradition, these classic buttery Christmas cookies deserve a place in your recipe collection!
Preparation Time and Yield
- Preparation time: 20 minutes
- Chilling time: 30 minutes
- Baking time: 8–12 minutes per batch
- Total time: Approximately 1 hour, depending on batch size
- Yield: About 30–36 cookies
- Difficulty: Easy
Ingredients
Here is everything you need to make a batch of classic Christmas butter cookies.
- 1 cup (226 g) unsalted butter, softened to room temperature
- ¾ cup (150 g) granulated sugar
- 1 large egg, at room temperature
- 2 teaspoons vanilla extract
- 2¼ cups (280 g) all-purpose flour
- ½ teaspoon baking powder
- ¼ teaspoon salt
- ½ cup Christmas sprinkles, optional
Optional Decoration
- Red and green sugar crystals
- Melted white or dark chocolate
- Simple vanilla icing
- Crushed peppermint candy
These decorations are optional, so you can keep the cookies simple or make them as festive as you like.
Instructions
Step 1: Prepare the oven and baking trays
Preheat your oven to 350°F (175°C).
Line two baking trays with parchment paper. This helps prevent sticking and makes cleanup much easier.
Measure all your ingredients before starting so the preparation goes smoothly.
Step 2: Cream the butter and sugar
Place the softened butter and granulated sugar in a large mixing bowl.
Beat with an electric mixer for approximately 2–3 minutes, until the mixture looks pale, light, and fluffy.
This step helps incorporate air into the mixture and contributes to a tender cookie texture.
Avoid using butter that is completely melted, as it can make the dough too soft and cause the cookies to spread excessively.
Step 3: Add the egg and vanilla
Add the egg and vanilla extract to the butter mixture.
Beat until everything is well combined, scraping down the sides of the bowl when necessary.
The mixture should look smooth and creamy. If it appears slightly separated, continue mixing briefly until the ingredients come together.
Step 4: Combine the dry ingredients
In a separate bowl, whisk together the flour, baking powder, and salt.
Mixing these ingredients separately helps distribute the baking powder and salt evenly throughout the dough.
Step 5: Make the cookie dough
Gradually add the dry ingredients to the butter mixture.
Mix on low speed or stir with a spatula until a soft dough forms. Stop mixing as soon as the flour disappears.
If you’re using Christmas sprinkles, gently fold them into the dough.
The dough should be soft enough to shape but not excessively sticky.
Step 6: Chill the dough
Cover the bowl and refrigerate the dough for approximately 30 minutes.
Chilling makes the dough easier to handle and helps the cookies retain their shape during baking.
If the dough becomes very firm in the refrigerator, let it sit at room temperature for a few minutes before shaping.
Step 7: Shape the cookies
Roll the dough into small balls, approximately 1 tablespoon each, and arrange them on the prepared baking trays, leaving about 2 inches between them.
Gently flatten each ball with the bottom of a glass or your fingers.
For a traditional Christmas look, you can instead roll the dough to approximately ¼ inch thick and cut out stars, trees, bells, or gingerbread-person shapes. If using cookie cutters, keep the dough chilled so the shapes remain neat.
Step 8: Bake until lightly golden
Bake for approximately 8–12 minutes, depending on the thickness and size of the cookies.
The edges should look set, while the centers may remain pale. For soft cookies, avoid waiting until the entire surface becomes deeply golden.
Keep an eye on the first batch because ovens can vary.
Step 9: Cool the cookies
Remove the trays from the oven and allow the cookies to rest for about 5 minutes.
Transfer them carefully to a wire rack to cool completely.
The cookies will become firmer as they cool, so don’t worry if they seem slightly soft when they first come out of the oven.
Step 10: Decorate and serve
Once the cookies have cooled completely, decorate them with icing, melted chocolate, or additional festive sprinkles.
Allow any icing or chocolate to set before stacking or packaging the cookies.
Arrange them on a beautiful Christmas platter, serve them with your favorite warm drink, or place them in gift boxes for friends and family.
Your homemade Christmas cookies are ready to enjoy!
Method of Preparation
The success of these cookies depends on a few simple techniques.
1. The creaming method
Beat the butter and sugar together until light and fluffy. This creates a smooth base and helps produce a tender texture.
2. The mixing method
Add the egg and vanilla first, then incorporate the dry ingredients gradually. Avoid overmixing once the flour is added.
3. The chilling method
Refrigerate the dough before shaping. This improves handling and helps reduce excessive spreading in the oven.
4. The shaping method
Make evenly sized dough balls or roll the dough out for cutout cookies. Uniform sizes help the cookies bake at approximately the same rate.
5. The baking method
Bake at 350°F (175°C) until the edges are set. Watch the first tray closely to determine the ideal baking time for your oven.
6. The decorating method
Wait until the cookies are fully cool before adding icing or melted chocolate. This prevents decorations from melting or sliding off.
A Little History of Christmas Cookies
Christmas cookies have a long and fascinating history rooted in European baking traditions.
Centuries ago, spices such as cinnamon, ginger, nutmeg, and cloves became popular ingredients in festive baked goods. As trade expanded and ingredients became more accessible, families developed special recipes for celebrations and holidays.
In Europe, traditions involving spiced biscuits and shaped cookies evolved over generations. Gingerbread, shortbread, and butter cookies became associated with festive gatherings in different regions.
As European baking traditions spread to North America, Christmas cookies became an important part of holiday celebrations. Families began preparing assorted cookies to share with neighbors, exchange as gifts, and serve at seasonal parties.
Today, Christmas cookies come in countless varieties, from simple buttery rounds to elaborate iced sugar cookies and spiced gingerbread figures.
Although this particular butter-cookie recipe does not have one specific documented origin, it reflects the enduring appeal of homemade holiday baking: familiar ingredients, simple preparation, and the joy of sharing something delicious.
Benefits of Homemade Christmas Cookies
These cookies are primarily a festive treat, but making them at home has several practical advantages.
1. Simple, familiar ingredients
Butter, flour, sugar, egg, and vanilla are common baking ingredients. Making cookies yourself also allows you to choose the brands and ingredients you prefer.
2. Customizable decorations
You can adjust the colors, shapes, and toppings for Christmas, birthdays, or other celebrations.
3. Great for sharing
One batch can produce several dozen cookies, making them useful for holiday platters, gift boxes, and gatherings.
4. A fun family activity
Measuring ingredients, rolling dough, and decorating cooled cookies can be enjoyable activities for family members of different ages, with adult supervision around the hot oven.
5. Convenient to prepare ahead
The dough can be refrigerated before baking, and fully cooled cookies can be stored for several days. This makes holiday planning easier.
A little nutritional perspective: These cookies contain butter and added sugar, so they’re best enjoyed as a dessert or occasional treat. Their main purpose is to bring a little sweetness and enjoyment to holiday celebrations.
Formation: What Makes These Cookies So Tender?
Several things happen during preparation and baking that create the cookies’ characteristic texture.
The butter and sugar: Creaming these ingredients helps create a light, evenly mixed base.
The egg: The egg contributes moisture and helps bind the ingredients together.
The flour: Flour provides the structure that allows the dough to hold its shape.
The baking powder: A small amount adds gentle lift and helps keep the cookies from becoming too dense.
The oven heat: During baking, the butter melts, the dough sets, and the edges develop a delicate golden color.
The cooling process: Once the cookies come out of the oven, they continue to firm up as they cool, creating a tender center with a lightly crisp edge.
The key is to avoid adding too much flour or baking the cookies for too long.
Tips for Perfect Christmas Cookies Every Time
- Use softened butter: It should yield slightly when pressed but should not look oily or melted.
- Measure flour accurately: Too much flour can make cookies dry or crumbly.
- Don’t skip chilling: Especially important if you’re using cookie cutters.
- Avoid overmixing: Too much mixing after adding flour can make the texture tougher.
- Use similar-sized portions: This helps the cookies bake evenly.
- Watch the edges: The cookies may look pale in the middle when they are ready.
- Cool before decorating: Icing and chocolate hold their shape better on completely cooled cookies.
- Bake in batches: Leave enough space between cookies to allow for slight spreading.
- Test one tray first: Adjust the baking time if your oven runs hotter or cooler than expected.
Delicious Variations to Try
Chocolate-Dipped Christmas Cookies
Dip half of each cooled cookie in melted chocolate and decorate with festive sprinkles. Let the chocolate set before serving.
Festive Cutout Cookies
Roll the dough and cut out stars, Christmas trees, bells, and other holiday shapes. Decorate with colored icing after baking.
Orange-Vanilla Cookies
Add 1 teaspoon of finely grated orange zest to the butter mixture for a fresh citrus aroma.
Cinnamon Sugar Cookies
Add ½ teaspoon ground cinnamon to the dry ingredients for a warm, cozy holiday flavor.
Storage Instructions
Proper storage helps keep your Christmas cookies fresh and delicious.
- Room temperature: Store fully cooled, undecorated cookies in an airtight container for approximately 5–7 days.
- Refrigerator: Usually unnecessary for plain butter cookies, but follow the storage instructions for any perishable icing or filling.
- Freezer: Freeze plain baked cookies in a sealed freezer-safe container for up to 2–3 months for best quality.
- Cookie dough: Wrap well and refrigerate for up to about 2 days, or freeze for longer storage.
- Gift packaging: Allow all icing and chocolate to harden before stacking the cookies or placing them in gift boxes.
For the best texture, keep the container away from direct sunlight, heat, and moisture.
Frequently Asked Questions
Can I make these cookies ahead of Christmas?
Yes! You can prepare the dough in advance, refrigerate it, or freeze it for later baking. You can also bake the cookies ahead of time and freeze them once completely cooled.
Why did my cookies spread too much?
The butter may have been too warm, the dough may not have been chilled enough, or the baking tray may have been hot when the next batch was placed on it. Chill the dough and use a cool tray.
Why are my cookies dry?
Too much flour or overbaking is often the cause. Measure carefully and remove the cookies when the edges are set rather than waiting for the entire cookie to become dark golden.
Can I make these cookies without an electric mixer?
Yes. A sturdy wooden spoon and some effort can work, although creaming the butter and sugar will take longer.
Can I decorate the cookies with royal icing?
Absolutely. Let the cookies cool completely first, and allow the icing to dry thoroughly before stacking or packaging them.
Can I double the recipe?
Yes. Double all the ingredients, but mix in batches if your bowl is too small. Bake one tray at a time when possible for more consistent results.
How can I make the cookies softer?
Avoid overbaking and keep the cookies in an airtight container once cooled. The exact texture also depends on the thickness and shape of the cookies.
Serving Ideas for the Holiday Season
These Christmas cookies are wonderful for almost any festive occasion.
- Serve them on a decorated platter after Christmas dinner.
- Pair them with hot chocolate, tea, or coffee.
- Include them in homemade cookie gift boxes.
- Add them to a holiday dessert table alongside brownies and fudge.
- Prepare a cookie-decorating station for a family gathering.
- Arrange them in clear bags tied with red or green ribbons.
- Bring them to a cookie exchange or holiday party.
For a beautiful presentation, combine plain butter cookies with decorated cutout cookies in different shapes and colors.
Conclusion
Classic Christmas butter cookies are a wonderful reminder that some of the best holiday treats come from the simplest recipes. With butter, sugar, vanilla, and a few basic baking ingredients, you can create a batch of tender, delicious cookies that everyone will enjoy.
They’re easy to prepare, simple to customize, and perfect for sharing with family, friends, and neighbors. Whether you bake them by the dozen or prepare several batches for holiday gifts, their buttery flavor and festive decorations make them a timeless addition to the Christmas season.
The secret is to measure carefully, chill the dough, avoid overbaking, and have fun decorating your creations.
Make a batch this holiday season, fill your kitchen with the wonderful aroma of freshly baked cookies, and create sweet memories that your family will look forward to year after year!
For All the Christmas Cookie Lovers! 🎄❤️
If you love homemade Christmas cookies, festive baking, and easy recipes that bring everyone together, this recipe is worth saving.
These cookies are buttery, tender, and perfect for holiday parties, cookie exchanges, and thoughtful homemade gifts. You can keep them simple with a sprinkle of sugar or decorate them with colorful icing for a more festive look.
Want to keep discovering delicious recipes? Save this recipe, share it with someone who loves Christmas baking, and tell us in the comments which decoration you would choose!
Type “YES” if you love homemade Christmas cookies and want more easy holiday recipes! 🍪🎅
Final Recipe Card
Classic Christmas Butter Cookies
Easy festive cookies · Makes approximately 30–36
Prep
20 min
Chill
30 min
Bake
8–12 min
Ingredients
- 1 cup (226 g) softened unsalted butter
- ¾ cup (150 g) granulated sugar
- 1 large egg
- 2 teaspoons vanilla extract
- 2¼ cups (280 g) all-purpose flour
- ½ teaspoon baking powder
- ¼ teaspoon salt
- ½ cup Christmas sprinkles, optional
Quick directions
- Preheat oven to 350°F (175°C).
- Cream butter and sugar until light and fluffy.
- Beat in the egg and vanilla.
- Whisk the flour, baking powder, and salt separately, then mix into the wet ingredients.
- Fold in sprinkles and chill the dough for 30 minutes.
- Shape the cookies and place them on parchment-lined trays.
- Bake for 8–12 minutes, until the edges are set.
- Cool completely and decorate as desired.
Copy recipe card
One batch, dozens of sweet memories, and all the magic of Christmas in every bite! 🎄🍪❤️