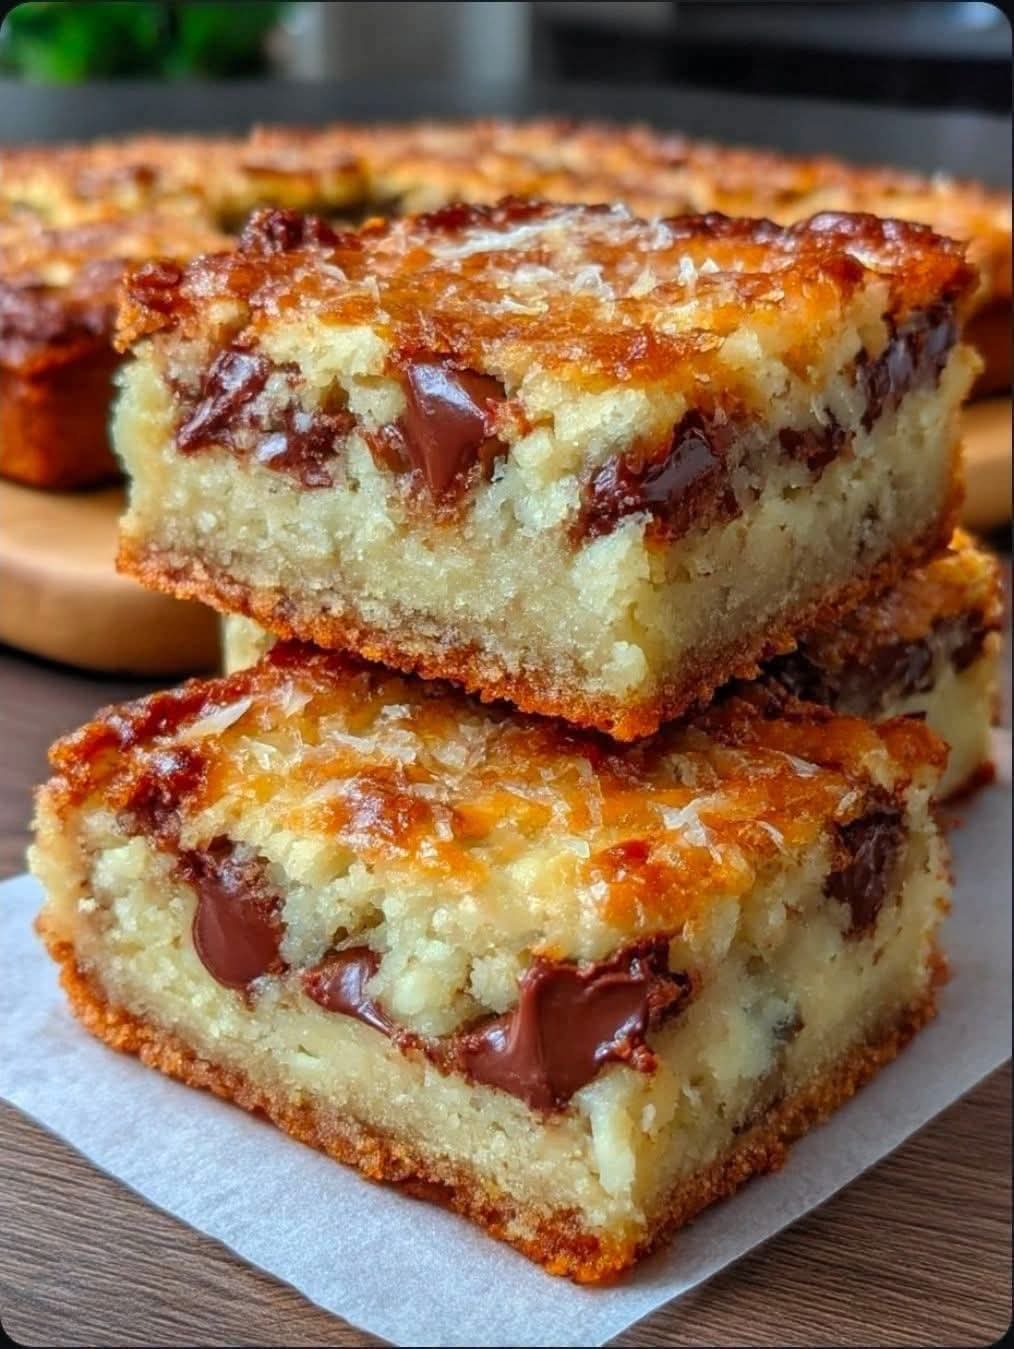
🍫 Soft & Chewy Chocolate Chip Cookie Bars – Buttery, Golden & Loaded with Chocolate!
1. Introduction
If you love freshly baked chocolate chip cookies but want something even easier to prepare, these Soft & Chewy Chocolate Chip Cookie Bars are exactly what you need!
Imagine a thick, buttery cookie base with beautifully golden edges, a soft and tender center, and generous chunks of melted chocolate in every bite.
These homemade cookie bars bring together everything we love about classic chocolate chip cookies, but without the extra work of rolling individual cookies or baking multiple batches.
Simply prepare one delicious cookie dough, spread it into a baking pan, sprinkle extra chocolate on top, and bake until golden.
The result is a rich, soft, slightly chewy dessert with irresistible chocolate pockets throughout.
Perfect for family gatherings, holiday dessert trays, birthday parties, afternoon snacks, or whenever you need a sweet homemade treat!
2. Ingredients
For the cookie bars:
- 2½ cups (315 g) all-purpose flour
- 1 cup (226 g) unsalted butter, softened
- ¾ cup (150 g) packed light brown sugar
- ½ cup (100 g) granulated white sugar
- 2 large eggs, room temperature
- 2 teaspoons vanilla extract
- 1 teaspoon baking soda
- ½ teaspoon salt
- 1 tablespoon cornstarch (for extra softness)
- 1½ cups (255 g) semi-sweet chocolate chips or chocolate chunks
For the topping:
- ½ cup extra chocolate chunks
- 2 tablespoons mini chocolate chips
- A pinch of flaky sea salt (optional)
3. Instructions
Step 1: Prepare the baking pan
Preheat your oven to 350°F (175°C).
Grease a 9 × 13-inch baking pan lightly with butter or cooking spray.
Line the pan with parchment paper, leaving a little overhang on the sides to make removing the bars easier.
Step 2: Cream the butter and sugars
In a large mixing bowl, combine the softened butter, brown sugar, and granulated sugar.
Using an electric mixer, beat for approximately 2–3 minutes until the mixture becomes light, fluffy, and creamy.
This step helps create the wonderful soft texture of the finished cookie bars.
Step 3: Add the eggs and vanilla
Add the eggs one at a time, mixing well after each addition.
Pour in the vanilla extract and continue mixing until everything is smooth and fully combined.
Scrape down the sides of the bowl as needed.
Step 4: Combine the dry ingredients
In a separate bowl, whisk together the all-purpose flour, baking soda, salt, and cornstarch.
Mix until evenly distributed.
Step 5: Make the cookie dough
Gradually add the dry ingredients to the butter mixture.
Mix on low speed until just combined.
Avoid overmixing because this can make the bars dense and tough.
Step 6: Add the chocolate
Fold the chocolate chips or chocolate chunks into the cookie dough using a spatula.
Make sure the chocolate is evenly distributed throughout the mixture.
Reserve a handful of chocolate chunks for the topping.
Step 7: Transfer to the baking pan
Spread the cookie dough evenly into the prepared baking pan.
Use a spatula or clean hands to gently press the dough into the corners.
Sprinkle the reserved chocolate chunks over the top.
Step 8: Bake until golden
Place the pan in the preheated oven.
Bake for approximately 25–32 minutes, or until the edges are golden brown and the center is just set.
The middle should remain slightly soft because the bars will continue to firm up as they cool.
Step 9: Cool completely
Remove the pan from the oven.
Allow the cookie bars to cool in the pan for at least 45–60 minutes.
For the cleanest slices, let them cool completely before cutting.
Step 10: Slice and serve
Lift the cookie slab out using the parchment paper.
Cut into evenly sized squares or rectangles.
For an extra-special finish, sprinkle with flaky sea salt and serve while the chocolate is still slightly soft.
Enjoy your homemade chocolate chip cookie bars!
4. Different Preparation Methods
Method 1: Classic oven-baked method
This is the traditional method. Prepare the cookie dough, spread it into a baking pan, and bake until the edges become golden and the center is soft.
Method 2: Extra-chewy method
Use a little extra brown sugar and avoid overbaking. This helps create a softer, chewier texture.
Method 3: Chocolate-loaded method
Mix milk chocolate, semi-sweet chocolate, and dark chocolate chunks into the dough for multiple layers of chocolate flavor.
Method 4: Brown butter method
Melt the butter in a saucepan and cook gently until it develops a golden color and nutty aroma. Cool until solid but still soft before using it in the recipe.
This adds a deeper, toasted buttery flavor.
5. History of Chocolate Chip Cookie Bars
Chocolate chip cookies have a special place in American baking history.
The original chocolate chip cookie was created in the United States in the 1930s and became one of the country’s most beloved homemade desserts.
As home baking evolved, cooks began adapting traditional cookie dough into larger tray-baked desserts.
Instead of shaping individual cookies, they spread the dough into rectangular pans and baked it as one large piece.
This created what we now know as chocolate chip cookie bars.
The bar version became popular because it was convenient, easy to prepare, and perfect for serving a crowd.
Today, chocolate chip cookie bars are enjoyed at bake sales, birthday parties, family celebrations, and holiday gatherings.
6. Benefits of Homemade Chocolate Chip Cookie Bars
These delicious treats have several practical advantages:
- Easy preparation: No need to roll or shape individual cookies.
- Convenient serving: One large batch can be cut into many portions.
- Customizable ingredients: Choose your favorite chocolate and add-ins.
- Homemade freshness: Freshly baked bars have wonderful buttery aromas.
- Make-ahead friendly: Bake them ahead of gatherings and store properly.
- Perfect for sharing: Their square shape makes them easy to serve and package.
These are indulgent treats containing butter, sugar, and chocolate, so enjoy them in moderation.
7. Formation, Texture & Presentation
The secret to beautiful cookie bars is achieving the perfect balance between the golden edges and soft center.
- Top layer: Beautifully golden with melted chocolate chunks.
- Outer edges: Slightly crisp and buttery.
- Middle: Soft, thick, and wonderfully chewy.
- Chocolate pockets: Rich melted chocolate throughout every slice.
- Bottom: Lightly golden with a delicious cookie texture.
For a bakery-style presentation, stack several squares on a wooden serving board.
Add a few extra chocolate chunks on top and a light sprinkle of flaky sea salt.
8. Delicious Variations
Try these tasty combinations:
- Double Chocolate Bars: Add cocoa powder and extra chocolate chunks.
- Peanut Butter Cookie Bars: Swirl creamy peanut butter into the dough.
- Chocolate Walnut Bars: Add ½ cup chopped walnuts.
- M&M Cookie Bars: Mix colorful M&M candies into the dough.
- White Chocolate Bars: Replace some semi-sweet chocolate with white chocolate chips.
- Caramel Chocolate Bars: Add caramel baking bits for a sweet, buttery center.
- Christmas Cookie Bars: Add red and green chocolate candies for a festive dessert.
9. Storage Instructions
- Room temperature: Store in an airtight container for up to 4 days.
- Refrigerator: Keep for up to 7 days in an airtight container.
- Freezer: Freeze individually wrapped bars for up to 2–3 months.
- Reheating: Microwave one bar for approximately 10–15 seconds to soften the chocolate.
Allow frozen bars to thaw before serving.
10. Helpful Tips for Perfect Results
- Use room-temperature butter and eggs.
- Measure the flour accurately.
- Don’t overmix the dough after adding the flour.
- Use good-quality chocolate chunks.
- Reserve extra chocolate for the top.
- Avoid overbaking if you want a soft center.
- Allow the bars to cool before slicing.
- Use parchment paper for easy removal.
- For extra flavor, try brown butter.
11. Conclusion
These Soft & Chewy Chocolate Chip Cookie Bars are everything a homemade dessert should be: buttery, sweet, rich, and filled with delicious chocolate!
Their golden edges and soft centers make every bite special.
Whether you’re preparing dessert for your family, making treats for a holiday celebration, or simply craving something sweet with your afternoon coffee, this recipe is always a wonderful choice.
It’s easy, reliable, and perfect for sharing.
12. For Chocolate Lovers ❤️
Calling all chocolate lovers! These thick, homemade cookie bars are packed with chocolate chunks and delicious buttery cookie flavor.
Imagine breaking apart a freshly baked square and seeing all that melted chocolate inside!
Serve them warm with a glass of cold milk, a cup of coffee, or even a scoop of vanilla ice cream.
One bite will make you want another!
13. Final Preparation Methods – Quick Summary
| Step | Preparation |
| 1 | Preheat oven to 350°F |
| 2 | Cream butter and sugars |
| 3 | Add eggs and vanilla |
| 4 | Mix in dry ingredients |
| 5 | Fold in chocolate chunks |
| 6 | Spread dough into baking pan |
| 7 | Bake for 25–32 minutes |
| 8 | Cool and slice into squares |
14. Complete Recipe Details
- Prep time: 15 minutes
- Baking time: 25–32 minutes
- Cooling time: 45–60 minutes
- Total time: Approximately 1 hour 25 minutes
- Servings: 16–20 bars
- Difficulty: Easy
- Category: Dessert / Cookie Bars
- Cuisine: American
15. Final Conclusion & Sweet Lovers’ Message
Sometimes the simplest homemade desserts become the most unforgettable family favorites.
These chocolate chip cookie bars bring together buttery goodness, golden edges, a soft center, and generous pieces of melted chocolate.
They’re perfect for sharing, celebrating, gifting, or enjoying whenever a chocolate craving strikes.
Make a batch today and fill your kitchen with the wonderful smell of freshly baked cookies!
If you love thick, soft, chocolate-loaded cookie bars, leave a big YUM in the comments! 🍫❤️
Save this recipe and share it with someone who loves homemade desserts!