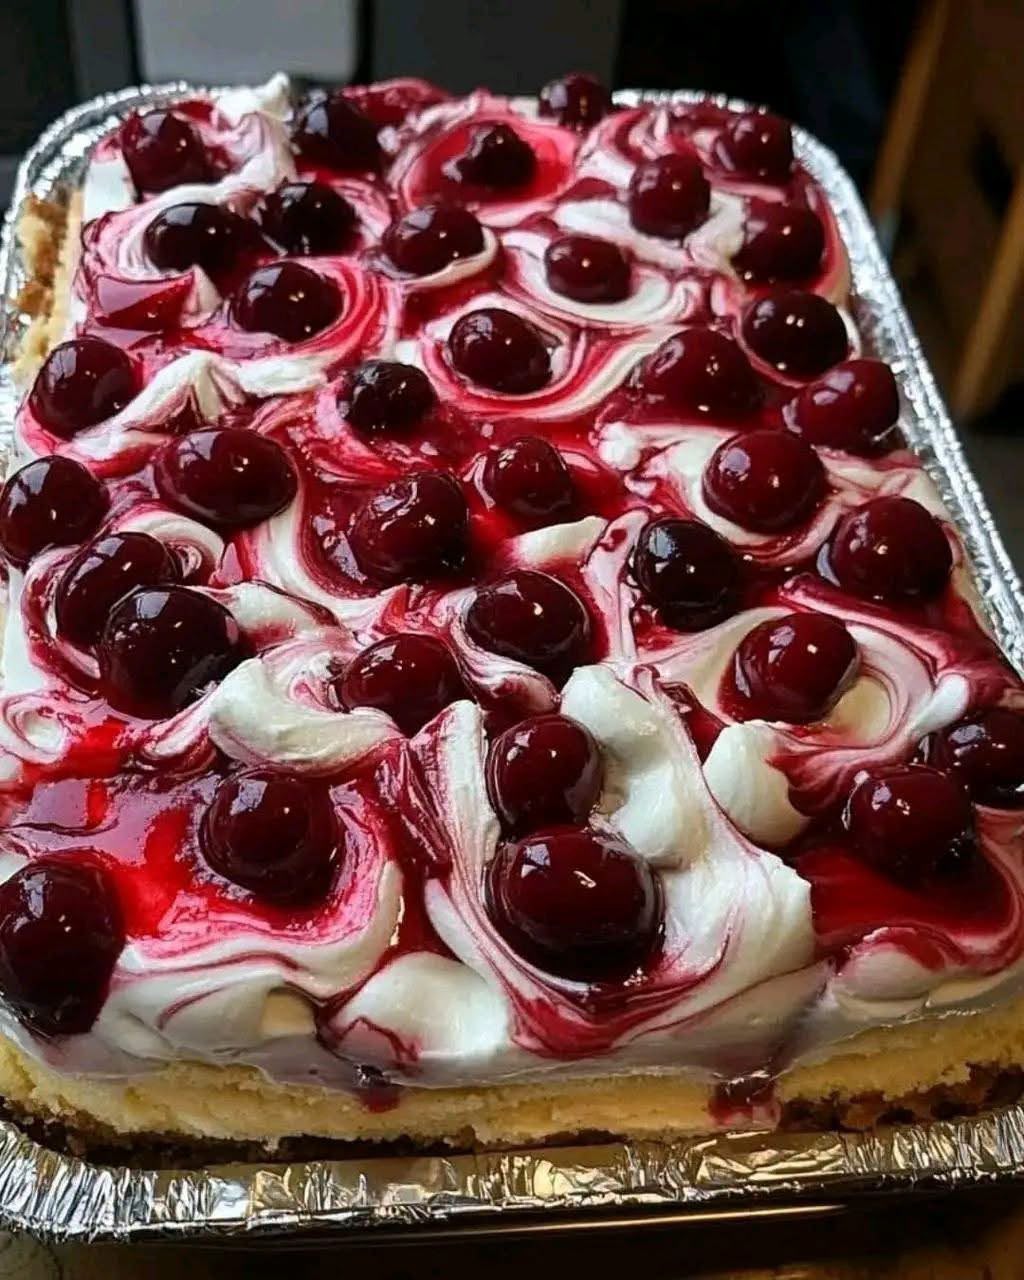
Introduction ❤️
I make this dessert at least twice a week, and every time I prepare it, everyone wants another spoonful! It’s smooth, creamy, sweet, and incredibly easy to make. The secret is simple: everything goes into the blender, so you don’t need complicated techniques or hours of preparation.
This no-bake creamy dessert is perfect for family dinners, weekend treats, birthday celebrations, or those moments when you crave something sweet without spending the whole day in the kitchen.
With a delicate vanilla flavor, a refreshing hint of lemon, and a silky texture, this dessert tastes wonderfully luxurious despite being so simple to prepare.
The best part? You can customize it with fresh fruit, chocolate, caramel, or crunchy biscuits to make it your own!
Ingredients 🥛
Here is everything you need to prepare this delicious blender dessert.
- 225 g (8 oz) cream cheese, softened
- 1 can sweetened condensed milk, approximately 397 g (14 oz)
- 240 ml (1 cup) heavy whipping cream, cold
- 120 g (½ cup) plain Greek yogurt
- 1 teaspoon vanilla extract
- 2 tablespoons fresh lemon juice
- 1 cup crushed digestive biscuits or graham crackers (optional, for a base)
- Fresh strawberries, blueberries, or chocolate shavings (optional, for decoration)
Optional biscuit base
For a dessert with a crunchy bottom, combine the crushed biscuits with 3 tablespoons of melted butter. Divide the mixture between your serving glasses and press it down gently before adding the cream.
Instructions: Step-by-Step 👩🍳
Step 1: Prepare the ingredients
Remove the cream cheese from the refrigerator about 20–30 minutes before starting. Softened cream cheese blends more easily and helps prevent lumps.
Step 2: Add everything to the blender
Place the cream cheese, condensed milk, cold whipping cream, Greek yogurt, vanilla extract, and lemon juice into your blender.
Step 3: Blend until smooth
Blend for about 30–60 seconds, stopping to scrape down the sides if necessary. Continue only until the mixture looks creamy and uniform. Avoid excessive blending, which can affect the texture.
Step 4: Prepare the serving glasses
If you want a biscuit base, add the buttered crumbs to the bottom of each glass and press gently. You can skip this step if you prefer a completely smooth dessert.
Step 5: Fill the glasses
Divide the mixture between six small glasses or ramekins. Smooth the tops with a spoon for a neat finish.
Step 6: Refrigerate
Cover the glasses and refrigerate for at least 4–6 hours, preferably overnight. This helps the dessert become colder and firmer.
Step 7: Decorate and serve
Add fresh strawberries, blueberries, grated chocolate, or biscuit crumbs just before serving. Enjoy your homemade creamy dessert!
Preparation Methods and Timing
Preparation time
10 minutes
Chilling time
4–6 hours, or overnight
Servings
Approximately 6 portions
Difficulty
Easy — no baking required
Tips for a perfect result
- Use full-fat cream cheese for a rich, smooth texture.
- Make sure the cream cheese is soft before blending.
- Add lemon juice gradually if you prefer a milder citrus flavor.
- Don’t blend longer than necessary.
- Allow enough chilling time before serving.
- For a firmer cheesecake-style dessert, use a recipe specifically formulated with a setting agent such as gelatin.
Important: This recipe produces a soft, spoonable cream dessert. It may not become firm enough to slice like a traditional cheesecake.
A Little History of Blender Desserts 📖
Blender desserts became increasingly popular as electric blenders found their way into home kitchens during the twentieth century. Home cooks discovered that these appliances could simplify the preparation of puddings, milkshakes, creamy fillings, and chilled desserts.
No-bake cream desserts have also remained popular because they require little equipment and no oven. Combining cream cheese, sweetened condensed milk, and flavorings is a modern home-cooking approach inspired by the broader tradition of chilled cheesecakes and creamy puddings.
Today, quick blender desserts are especially popular among busy families and home cooks who want delicious results with minimal effort.
Benefits of This Recipe ✨
1. Quick and convenient
Most of the preparation takes only about 10 minutes, making this a useful recipe for busy days.
2. Minimal cleanup
You only need a blender, a spatula, and a few serving glasses.
3. Perfect for preparing ahead
Make the dessert the night before a gathering so it is ready when you need it.
4. Easy to customize
You can change the flavor with lemon zest, cocoa powder, coffee, berries, or different toppings.
5. Easy portion control
Individual glasses make serving simple and help you choose the amount you want to enjoy.
6. A satisfying sweet treat
The creamy texture and rich flavor make it a lovely dessert to finish a meal.
Remember that condensed milk adds sugar, while cream and cream cheese contribute saturated fat. This is a rich dessert best enjoyed in portions that suit your preferences and dietary needs.
Formation and Presentation Ideas 🍓
Make your dessert look beautiful with these simple serving ideas.
- Strawberry version: Add sliced strawberries and a small mint leaf.
- Lemon version: Sprinkle lemon zest over the top for a fresh citrus aroma.
- Chocolate version: Add grated dark chocolate or a light dusting of cocoa powder.
- Biscuit version: Create alternating layers of crushed biscuits and cream.
- Berry version: Finish with blueberries, raspberries, or a mixture of seasonal fruits.
- Caramel version: Drizzle a small amount of caramel sauce over each serving just before serving.
For a party, use transparent glasses to show off the layers. For family dinners, one large glass dish works just as well.
Storage Instructions 🧊
- Store the dessert covered in the refrigerator.
- For the best quality, consume within 2–3 days.
- Keep it refrigerated until serving because it contains dairy products.
- Avoid leaving it at room temperature for more than 2 hours, or more than 1 hour when the temperature exceeds 32°C (90°F).
- Freezing may alter the creamy texture, so refrigeration is preferable.
Conclusion ❤️
This creamy blender dessert is proof that you don’t need complicated ingredients or hours in the kitchen to make something delicious. With a handful of familiar ingredients and a few minutes of preparation, you can create a smooth, sweet treat that looks beautiful and tastes wonderful.
Serve it after dinner, prepare it for a special occasion, or keep individual portions ready in the refrigerator for when you want something sweet.
Once you discover your favorite topping, you might find yourself making it every week!
For All Dessert Lovers! 😍
If you love creamy, easy, no-bake desserts, this recipe deserves a place in your collection.
🍓 Which topping would you choose: strawberries, chocolate, lemon, or crunchy biscuits?
💬 Comment “YUM” if you want to try this delicious blender dessert!
❤️ Save this recipe, share it with friends and family, and enjoy a little homemade sweetness whenever you like.
Recipe in the first comment! 👇🍰